Hey everyone, I hope you’re having an amazing day today. Today, I’m gonna show you how to make a distinctive dish, bean daifuku for the beginning of spring. One of my favorites food recipes. This time, I am going to make it a little bit tasty. This is gonna smell and look delicious.
Steamed beans comprise the savoryfilling of this soft rice cake treat. After soaking the beans overnight in water, put them in a pot with fresh water and sugar and boil. Keep an eye on them Do you have a suggestion for how to do this step without a microwave?
Bean Daifuku for the Beginning of Spring is one of the most favored of recent trending meals in the world. It is enjoyed by millions every day. It’s easy, it’s fast, it tastes yummy. They’re fine and they look fantastic. Bean Daifuku for the Beginning of Spring is something which I have loved my entire life.
To begin with this recipe, we must first prepare a few ingredients. You can cook bean daifuku for the beginning of spring using 7 ingredients and 6 steps. Here is how you cook that.
The ingredients needed to make Bean Daifuku for the Beginning of Spring:
- Get 50 grams ★Shiratamako
- Prepare 30 grams ★Sugar
- Make ready 1/2 tsp or a bit less ★Salt
- Make ready 75 grams ★Water
- Make ready 30 Japanese Black Beans (cooked and sweet) [small ones]
- Get 60 grams Adzuki bean paste (coarsely mashed)
- Prepare 1 Katakuriko
The most common daifuku is called ichigo-daifuku (strawberry mochi) or mame-daifuku (bean mochi), but recently new types of daifuku have been What you should try here is their ichigo daifuku. Bean is a key concept of the Spring Framework. As such, understanding this notion is crucial to get the hang of the framework and to use it in an effective way. Unfortunately, there aren't clear answers to a simple question - what a Spring bean really is.
Steps to make Bean Daifuku for the Beginning of Spring:
- Divide the bean paste into 3 portions (20 g each) and shape into balls (if you're making 4, divide into 4).
- Put all the ★ ingredients into a heatproof dish and stir well with chopsticks to dissolve. Cover with cling film and heat in a microwave (500 W for about 2 minutes). Remove from the microwave and stir well again.
- Cover with cling film again and microwave (about 1 minute). Take out and stir well.
- Repeat this process again (a total of three times heating in a microwave). According to the type of microwave you use at home or the quantity you heat, it may not be enough. Just keep repeating the same process several times. It's ready once the daifuku dough is very thick and translucent.
- Sprinkle katakuriko on a large tray and place the dough on top. Sprinkle on more and divide into 3 portions while it's hot (if you're making 4, then divide into 4). Fold in the black beans without squashing them and shape into flat rounds. (Dust your hands with katakuriko to prevent sticking).
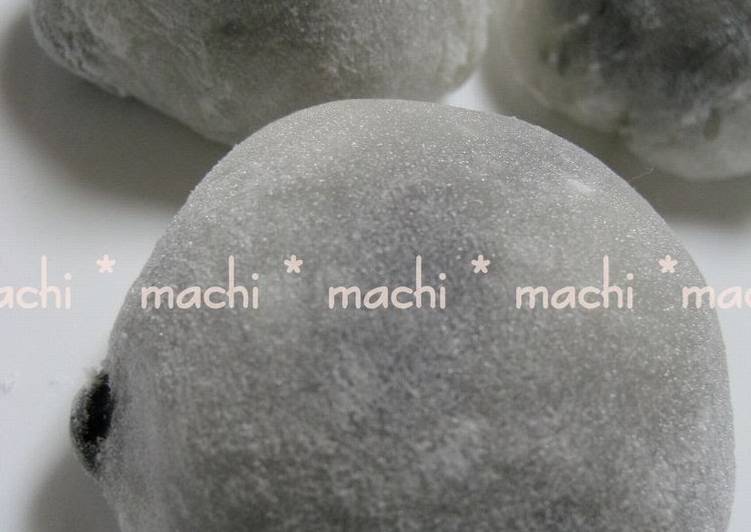
- Wrap the portioned tsubu-an with the dough from Step 5 by pushing it in with your fingers, then shape into balls. Done!
Daifuku is most commonly filled with red bean paste, but some are filled with white bean paste (Shiroan, 白餡). There are also mochi Don't want to miss a recipe? Sign up for the FREE Just One Cookbook newsletter delivered to your inbox! Nanohana is the rapeseed plants that are common during the beginning of spring season. By February, the tender stems with flower buds at the tip will be available at the supermarkets.
So that is going to wrap this up with this special food bean daifuku for the beginning of spring recipe. Thank you very much for your time. I’m confident that you can make this at home. There is gonna be more interesting food at home recipes coming up. Remember to save this page on your browser, and share it to your family, friends and colleague. Thanks again for reading. Go on get cooking!